时钟嘀嗒
可编程计数器(PIT)通常是在你主板上的8253/54芯片,它会以一定的时间间隔触发中断,我们准备使用它在后面的教程中来实现抢占式多任务。
8253有3个独立地由0x40~0x42端口控制的计数器。每个计数器都有一个16位的COUNT寄存器。每个寄存器可以以六个不同模式计数,并可以选择用BCD或者二进制计数。CONTROL可以通过端口0x42存取,控制字的格式如下,
| 位7,6 | 选择计数器,因为8253只有三个计数器,所以11b只对8254有效 |
| 位5,4 | 用11b来设定先访问最低有效位再访问最高有效位 |
| 位3-1 | 倒数的计数方式 |
| 位0 | 二进制模式(=0)还是BCD模式(=1) |
根据Intel手册,“启动后,8254的状态是未定义的。模式、计数器值和所有计数器的输出都是未定义的。每个计数器怎样工作是由它们是怎样被设定的来决定的。每一个计数器在使用前都必须被设定。”
05/timer/timer.c
void timer_install(int hz) {
这个函数用时钟频率作为参数初始化系统时钟。
unsigned int divisor = 1193180/hz;
outb(0x36, 0x43);
outb(divisor&0xff, 0x40);
outb(divisor>>8, 0x40);
我们准备使用计数器0,在二进制模式下,先写入低8位再写高8位。1193180是所有计数器都使用的作为时钟频率的固定值。
outb(inb(0x21)&0xfe, 0x21);
清除端口0x21的0位来打开PIC1的屏蔽。
}
volatile unsigned int timer_ticks = 0;
voidvoid
int x , y;
++timer_ticks;
get_cursor(&x, &y);
set_cursor(71, 24);
kprintf(KPL_DUMP, "%x", timer_ticks);
set_cursor(x, y);
在屏幕的右下角输出时钟滴答了多少次。
告诉PIC1中断处理结束,它可以接受新的中断了。因为时钟连接于PIC1,所以不必调用oub(0x20, 0xa0)去通知PIC2。
我们必须在多个文件中修改代码。
05/timer/include/isr.h
增加了一个ISR。
05/timer/isr.s
isr: .long divide_error, isr0x00, debug_exception, isr0x01
.long breakpoint, isr0x02, nmi, isr0x03
.long overflow, isr0x04, bounds_check, isr0x05
.long invalid_opcode, isr0x06, cop_not_avalid, isr0x07
.long double_fault, isr0x08, overrun, isr0x09
.long invalid_tss, isr0x0a, seg_not_present, isr0x0b
.long stack_exception, isr0x0c, general_protection, isr0x0d
.long page_fault, isr0x0e, reversed, isr0x0f
.long coprocessor_error, isr0x10, reversed, isr0x11
.long reversed, isr0x12, reversed, isr0x13
.long reversed, isr0x14, reversed, isr0x15
.long reversed, isr0x16, reversed, isr0x17
.long reversed, isr0x18, reversed, isr0x19
.long reversed, isr0x1a, reversed, isr0x1b
.long reversed, isr0x1c, reversed, isr0x1d
.long reversed, isr0x1e, reversed, isr0x1f
.long do_timer, isr0x20 # <<< HERE IT IS
同一个文件,
isrNoError 0x16
isrNoError 0x17
isrNoError 0x18
isrNoError 0x19
isrNoError 0x1a
isrNoError 0x1b
isrNoError 0x1c
isrNoError 0x1d
isrNoError 0x1e
isrNoError 0x1f
isrNoError 0x20 # <<< HERE IT IS
在结束之前,我们让Skelix做一点不那么枯燥的事,在左下角输出一个滚动的“轮子”。
05/timer/init.c
void
init(void) {
char wheel[] = {'\\', '|', '/', '-'};
int i = 0;
idt_install();
pic_install();
timer_install(100);
时钟中断每秒钟100次。
不要忘记打开所有中断。
for (;;) {
__asm__ ("movb %%al, 0xb8000+160*24"::"a"(wheel[i]));
if (i == sizeof wheel)
i = 0;
else
++i;
}
}
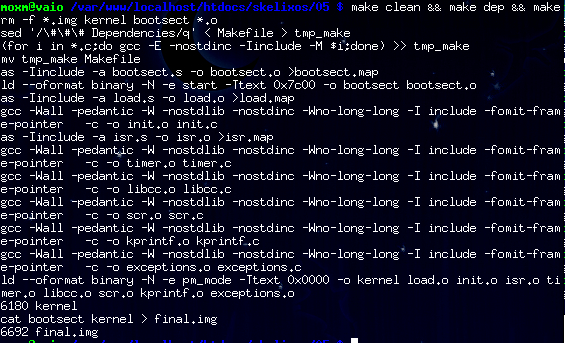
在Makefile文件中,将新模块加入到KERNEL_OBJS中去。
05/timer/Makefile
KERNEL_OBJS= load.o init.o isr.o timer.o libcc.o scr.o kprintf.o exceptions.o

时钟滴答、轮子乱转。

让键盘有用
在前面的教程中,我们有能力在屏幕上输出什么了,但是我们又能输出什么呢?什么都没有,其实。所以我们要让Skelix能接受键盘输入。
当有键被按下时,一个8位的扫描码会被发送到计算机。例如当a被按下时,扫描码0x1E(其实这个值取决于你的键盘布局)会被发送,当键被松开时,扫描码的第一位被设置,像0x1E | 0x10 = 0x9E会被发送。一些特殊的键例如Break、Home之类的不会在本教程中处理。所以这就是在本节中你所需要知道的全部东西。
这是我用的键盘映射,如果你使用了其它的键盘布局,可能你需要自己去找一下。
| 扫描码 | 键 | 扫描码 | 键 | 扫描码 | 键 | 扫描码 | 键 | 扫描码 | 键 | 扫描码 | 键 |
|---|
| 01 | ESC | 02 | 1! | 03 | 2@ | 04 | 3# | 05 | 4$ | 06 | 5% |
| 07 | 6^ | 08 | 7& | 09 | 8* | 0A | 9( | 0B | 0) | 0C | -_ |
| 0D | =+ | 0E | <-- | 0F | TAB | 10 | qQ | 11 | wW | 12 | eE |
| 13 | rR | 14 | tT | 15 | yY | 16 | uU | 17 | iI | 18 | oO |
| 19 | pP | 1A | [{ | 1B | ]} | 1C | Enter | 1D | LCTL | 1E | aA |
| 1F | sS | 20 | dD | 21 | fF | 22 | gG | 23 | hH | 24 | jJ |
| 25 | kK | 26 | lL | 27 | ;: | 28 | '" | 29 | `~ | 2A | LSHT |
| 2B | \| | 2C | zZ | 2D | xX | 2E | cC | 2F | vV | 30 | bB |
| 31 | nN | 32 | mM | 33 | ,< | 34 | .> | 35 | /? | 36 | RSHT |
| 37 | ** | 38 | LALT | 39 | SPACE | 3B-44 | F1-F10 | 57 | F11 | 58 | F12 |
如上,Ctrl、Shift和Alt都像其它键一样发送扫描码,所以我们可以通过记录这些键状态的方式显示正确的字符。
像往常一样,我们通过端口操纵键盘。
void
do_kb(void) {
int com;
voidvoid
/*00*/unp, unp, pln, pln, pln, pln, pln, pln,
/*08*/pln, pln, pln, pln, pln, pln, pln, pln,
/*10*/pln, pln, pln, pln, pln, pln, pln, pln,
/*18*/pln, pln, pln, pln, pln, ctl, pln, pln,
/*20*/pln, pln, pln, pln, pln, pln, pln, pln,
/*28*/pln, pln, shf, pln, pln, pln, pln, pln,
/*30*/pln, pln, pln, pln, pln, pln, shf, pln,
/*38*/alt, pln, unp, fun, fun, fun, fun, fun,
/*40*/fun, fun, fun, fun, fun, unp, unp, unp,
/*48*/unp, unp, unp, unp, unp, unp, unp, unp,
/*50*/unp, unp, unp, unp, unp, unp, unp, fun,
/*58*/fun, unp, unp, unp, unp, unp, unp, unp,
/*60*/unp, unp, unp, unp, unp, unp, unp, unp,
/*68*/unp, unp, unp, unp, unp, unp, unp, unp,
/*70*/unp, unp, unp, unp, unp, unp, unp, unp,
/*78*/unp, unp, unp, unp, unp, unp, unp, unp,
};
这是一个函数数组,当一个扫描码进来时,我们用它映射出什么样的键需要处理,unp不做任何动作;pln处理可打印字符;ctl处理Ctrl键;shf处理Shift键;alt处理Alt键;fun处理功能键F1-F12。
com = 0;
scan_code = inb(0x60);
从8042的输出寄存器0x60读取扫描码。
(*key_way[scan_code&0x7f])();
0x7F用来与扫描码想与来判断键是被按下还是释放,因为两种情况下低7位都是相同的。接着执行在数组key_way中对应的函数。
/* key stroke has been handled */
outb((com=inb(0x61))|0x80, 0x61);
outb(com&0x7f, 0x61);
实际上当我们从端口0x60读取扫描码后,它并不会被自动移除,所以我们可以从端口0x60中无数次地读取这个扫描码,但是这个特性也阻止了我们获得下面的键,所以我们必须告诉键盘控制器这个键我们已经处理过了。我们通过设置和清除端口0x61最高位的办法告诉控制器这一点。关于键盘控制器的详情请看这里。
outb(0x20, 0x20);
}
void
kb_install(void) {
outb(inb(0x21)&0xfd, 0x21);
}
static unsigned char shf_p = 0;
static unsigned char ctl_p = 0;
static unsigned char alt_p = 0;
static unsigned char scan_code;
储存当前Ctrl、Shift和Alt的状态,还有当前的扫描码。
/* printable char */
static void
pln(void) {
这个函数用来显示可打印字符。
static const char key_map[0x3a][2] = {
/*00*/{0x0, 0x0}, {0x0, 0x0}, {'1', '!'}, {'2', '@'},
/*04*/{'3', '#'}, {'4', '$'}, {'5', '%'}, {'6', '^'},
/*08*/{'7', '&'}, {'8', '*'}, {'9', '('}, {'0', ')'},
/*0c*/{'-', '_'}, {'=', '+'}, {'\b','\b'},{'\t','\t'},
/*10*/{'q', 'Q'}, {'w', 'W'}, {'e', 'E'}, {'r', 'R'},
/*14*/{'t', 'T'}, {'y', 'Y'}, {'u', 'U'}, {'i', 'I'},
/*18*/{'o', 'O'}, {'p', 'P'}, {'[', '{'}, {']', '}'},
/*1c*/{'\n','\n'},{0x0, 0x0}, {'a', 'A'}, {'s', 'S'},
/*20*/{'d', 'D'}, {'f', 'F'}, {'g', 'G'}, {'h', 'H'},
/*24*/{'j', 'J'}, {'k', 'K'}, {'l', 'L'}, {';', ':'},
/*28*/{'\'','\"'},{'`', '~'}, {0x0, 0x0}, {'\\','|'},
/*2c*/{'z', 'Z'}, {'x', 'X'}, {'c', 'C'}, {'v', 'V'},
/*30*/{'b', 'B'}, {'n', 'N'}, {'m', 'M'}, {',', '<'},
/*34*/{'.', '>'}, {'/', '?'}, {0x0, 0x0}, {'*', '*'},
/*38*/{0x0, 0x0}, {' ', ' '} };
根据扫描码定义可打印字符表。key_map[?][0]存储的是当Shift没有被按下时的字符,key_map[?][1]存储的是当Shift被按下时的字符。
if (scan_code & 0x80)
return;
print_c(key_map[scan_code&0x7f][shf_p], WHITE, BLACK);
如果键被释放,什么也不做。否则在屏幕上用黑底白字输出字符。
}
/* Ctrl */
static void
ctl(void) {
ctl_p ^= 0x1;
}
/* Alt */
static void
alt(void) {
alt_p ^= 0x1;
}
/* Shift */
static void
shf(void) {
shf_p ^= 0x1;
}
/* F1, F2 ~ F12 */
static void
fun(void) {
}
/* not implementated */
static void
unp(void) {
}
ctl、alt和shf函数仅仅设置状态。实际上本教程中我们只处理Shift键以输出大写字符。
快结束了,在isr表中加入,
05/keyboard/isr.s
.long do_timer, isr0x20, do_kb, isr0x21 #<<<=== over here
在同一个文件中,像处理时钟ISR那样,
isrNoError 0x20
isrNoError 0x21 #<<<=== over here
改变有效ISR的值,
05/keyboard/include/isr.h
最后,增加 kb_install到文件05/keyboard/init.c中。
timer_install(100);
kb_install(); /* here it is */
sti();
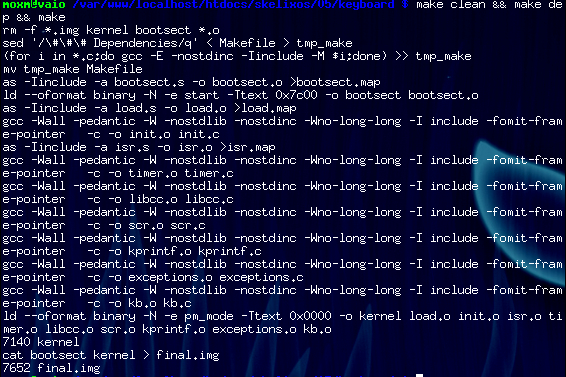
我们使用上一个Makefile文件,仅仅把新模块加入到KERNEL_OBJS中去,
05/keyboard/Makefile
KERNEL_OBJS= load.o init.o isr.o timer.o libcc.o scr.o kprintf.o exceptions.o kb.o

瞎敲吧……


