Timer Ticking
The programmable interval timer (PIT) that is usually a 8253/54 chip on your mother board which triggers an interrupt at a specified interval, we are going to use it for preemptive multitasking in later tutorials.
8253 has 3 independent counters controlled by ports 0x40~0x42. Each counter has a 16-bit COUNT register. Each counter may count in six different modes and also can be counted in BCD or binary.
The CONTROL register can be accessed via port 0x43. The format of control byte,
| Bits 7,6 | which counter we are going to select, 8253 has only 3 counters, so actually 11b only works in 8254 |
| Bits 5,4 | 11b means access selected counter in the order of LSB first, then MSB |
| Bits 3-1 | Count mode selection for countdown |
| Bit 0 | Count in 16-bit binary(=0) or 4 decimal BCD(=1) |
Based on Intel's Manual, "After power-up, the state of the 8254 is undefined. The Mode, count value, and output of all Counters are undefined.
How each Counter operates is determined when it is programmed. Each Counter must be programmed before it can be used."
05/timer/timer.c
void timer_install(int hz) {
This function takes the frequency of ticking to initialize system timer.
unsigned int divisor = 1193180/hz;
outb(0x36, 0x43);
outb(divisor&0xff, 0x40);
outb(divisor>>8, 0x40);
We are going to uses counter 0, writes lower 8-bit first then higher 8-bit in binary mode. 1193180 is a fixed number for all timer counters which used as clock frequency input.
outb(inb(0x21)&0xfe, 0x21);
Clear the mask in PIC1 by clearing the bit 0 in port 0x21.
}
volatile unsigned int timer_ticks = 0;
voidvoid
int x , y;
++timer_ticks;
get_cursor(&x, &y);
set_cursor(71, 24);
kprintf(KPL_DUMP, "%x", timer_ticks);
set_cursor(x, y);
Print the how many times the timer has been ticking at the right bottom of the screen.
Tells PIC1 this interrupt routine has finished, it can handle new incoming interrupts. Because the timer is connected to PIC1, so there is no need to use oub(0x20, 0xa0) to inform PIC2.
We have to modify some code in several existing files.
05/timer/include/isr.h
We have one more valid ISR in table.
05/timer/isr.s
isr: .long divide_error, isr0x00, debug_exception, isr0x01
.long breakpoint, isr0x02, nmi, isr0x03
.long overflow, isr0x04, bounds_check, isr0x05
.long invalid_opcode, isr0x06, cop_not_avalid, isr0x07
.long double_fault, isr0x08, overrun, isr0x09
.long invalid_tss, isr0x0a, seg_not_present, isr0x0b
.long stack_exception, isr0x0c, general_protection, isr0x0d
.long page_fault, isr0x0e, reversed, isr0x0f
.long coprocessor_error, isr0x10, reversed, isr0x11
.long reversed, isr0x12, reversed, isr0x13
.long reversed, isr0x14, reversed, isr0x15
.long reversed, isr0x16, reversed, isr0x17
.long reversed, isr0x18, reversed, isr0x19
.long reversed, isr0x1a, reversed, isr0x1b
.long reversed, isr0x1c, reversed, isr0x1d
.long reversed, isr0x1e, reversed, isr0x1f
.long do_timer, isr0x20 # <<< HERE IT IS
In the same file,
isrNoError 0x16
isrNoError 0x17
isrNoError 0x18
isrNoError 0x19
isrNoError 0x1a
isrNoError 0x1b
isrNoError 0x1c
isrNoError 0x1d
isrNoError 0x1e
isrNoError 0x1f
isrNoError 0x20 # <<< HERE IT IS
Before finishing this, just let Skelix do something less boring, let's make it print a "wheel" at the left bottom of the screen.
05/timer/init.c
void
init(void) {
char wheel[] = {'\\', '|', '/', '-'};
int i = 0;
idt_install();
pic_install();
timer_install(100);
We let the timer interrupt 100 timers per second.
Don't forget to enable interrupts.
for (;;) {
__asm__ ("movb %%al, 0xb8000+160*24"::"a"(wheel[i]));
if (i == sizeof wheel)
i = 0;
else
++i;
}
}
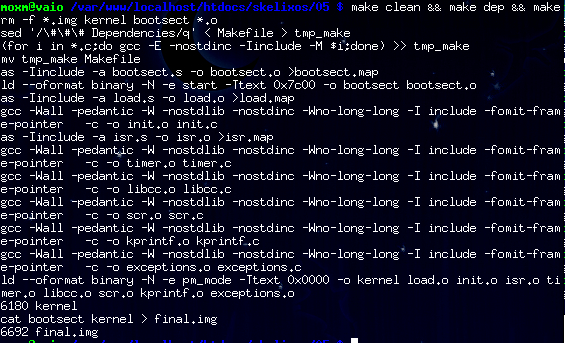
Let's change our Makefile by adding new modules into KERNEL_OBJS.
05/timer/Makefile
KERNEL_OBJS= load.o init.o isr.o timer.o libcc.o scr.o kprintf.o exceptions.o
Timer is ticking an wheel is rolling.
Let's Get keyboard work
Well, we have the ability of displaying some stuff on the screen in earlier tutorial, but what can we display? em......, at this moment nothing actually,
so we are going to make Skelix accept input from keyboard.
Once a key is pressed, a 8-bit scan code will be send to your computer. For example, once 'a' is pressed, the scan code 0x1E (actually this value depends on the layout of your keyboard) will be send,
when the key was released, the first bit of that scan code will be set, like 0x1E | 0x10 = 0x9E will be send in this case.
For some special keys like Break, Home etc. will not be handled in this tutorial. So that is all you need to know to finish our code in this tutorial.
This is the keyboard map that I am using, if you are using some other layouts, you might need to get it somewhere else.
| Scan code | Key | Scan Code | Key | Scan Code | Key | Scan Code | Key | Scan Code | Key | Scan Code | Key |
|---|
| 01 | ESC | 02 | 1! | 03 | 2@ | 04 | 3# | 05 | 4$ | 06 | 5% |
| 07 | 6^ | 08 | 7& | 09 | 8* | 0A | 9( | 0B | 0) | 0C | -_ |
| 0D | =+ | 0E | <-- | 0F | TAB | 10 | qQ | 11 | wW | 12 | eE |
| 13 | rR | 14 | tT | 15 | yY | 16 | uU | 17 | iI | 18 | oO |
| 19 | pP | 1A | [{ | 1B | ]} | 1C | Enter | 1D | LCTL | 1E | aA |
| 1F | sS | 20 | dD | 21 | fF | 22 | gG | 23 | hH | 24 | jJ |
| 25 | kK | 26 | lL | 27 | ;: | 28 | '" | 29 | `~ | 2A | LSHT |
| 2B | \| | 2C | zZ | 2D | xX | 2E | cC | 2F | vV | 30 | bB |
| 31 | nN | 32 | mM | 33 | ,< | 34 | .> | 35 | /? | 36 | RSHT |
| 37 | ** | 38 | LALT | 39 | SPACE | 3B-44 | F1-F10 | 57 | F11 | 58 | F12 |
As we can see, Ctrl, Shift and Alt are all send as normal scan code, so we can recode these keys' state to ensure we display correct characters on screen.
As usual, we access keyboard controller via ports.
void
do_kb(void) {
int com;
voidvoid
/*00*/unp, unp, pln, pln, pln, pln, pln, pln,
/*08*/pln, pln, pln, pln, pln, pln, pln, pln,
/*10*/pln, pln, pln, pln, pln, pln, pln, pln,
/*18*/pln, pln, pln, pln, pln, ctl, pln, pln,
/*20*/pln, pln, pln, pln, pln, pln, pln, pln,
/*28*/pln, pln, shf, pln, pln, pln, pln, pln,
/*30*/pln, pln, pln, pln, pln, pln, shf, pln,
/*38*/alt, pln, unp, fun, fun, fun, fun, fun,
/*40*/fun, fun, fun, fun, fun, unp, unp, unp,
/*48*/unp, unp, unp, unp, unp, unp, unp, unp,
/*50*/unp, unp, unp, unp, unp, unp, unp, fun,
/*58*/fun, unp, unp, unp, unp, unp, unp, unp,
/*60*/unp, unp, unp, unp, unp, unp, unp, unp,
/*68*/unp, unp, unp, unp, unp, unp, unp, unp,
/*70*/unp, unp, unp, unp, unp, unp, unp, unp,
/*78*/unp, unp, unp, unp, unp, unp, unp, unp,
};
This is an array of function pointers, when a scan code comes in, we use this map to tell what kind of key stroke we are processing, unp for unhandled keys,
pln for printable characters, ctl for Ctrl keys, shf for Shift keys, alt for Alt keys,
fun for function keys F1-F12.
com = 0;
scan_code = inb(0x60);
Reads scan code from 8042 output register 0x60.
(*key_way[scan_code&0x7f])();
0x7F is used to mask the scan code for telling this event is happening on which key, whether it is pressed or released, because in both situations the low 7-bit are the same.
Then execute the function located in array key_way.
/* key stroke has been handled */
outb((com=inb(0x61))|0x80, 0x61);
outb(com&0x7f, 0x61);
Actually after we read port 0x60 to get the scan code, the scan code will not be removed automatically, so we can read port 60 to get this scan code as many times as we want,
but this feature also stop us from reading further key strokes, so we have to tell the keyboard controller this key event has been handled. To achieve it, we have to disable and
re-enable it via the bit 7 of port 0x61. You may check the details of keyboard controller at here.
outb(0x20, 0x20);
}
void
kb_install(void) {
outb(inb(0x21)&0xfd, 0x21);
}
static unsigned char shf_p = 0;
static unsigned char ctl_p = 0;
static unsigned char alt_p = 0;
static unsigned char scan_code;
Stores current scan code and states of Ctrl, Shift and Alt keys.
/* printable char */
static void
pln(void) {
This function is used to display printable characters.
static const char key_map[0x3a][2] = {
/*00*/{0x0, 0x0}, {0x0, 0x0}, {'1', '!'}, {'2', '@'},
/*04*/{'3', '#'}, {'4', '$'}, {'5', '%'}, {'6', '^'},
/*08*/{'7', '&'}, {'8', '*'}, {'9', '('}, {'0', ')'},
/*0c*/{'-', '_'}, {'=', '+'}, {'\b','\b'},{'\t','\t'},
/*10*/{'q', 'Q'}, {'w', 'W'}, {'e', 'E'}, {'r', 'R'},
/*14*/{'t', 'T'}, {'y', 'Y'}, {'u', 'U'}, {'i', 'I'},
/*18*/{'o', 'O'}, {'p', 'P'}, {'[', '{'}, {']', '}'},
/*1c*/{'\n','\n'},{0x0, 0x0}, {'a', 'A'}, {'s', 'S'},
/*20*/{'d', 'D'}, {'f', 'F'}, {'g', 'G'}, {'h', 'H'},
/*24*/{'j', 'J'}, {'k', 'K'}, {'l', 'L'}, {';', ':'},
/*28*/{'\'','\"'},{'`', '~'}, {0x0, 0x0}, {'\\','|'},
/*2c*/{'z', 'Z'}, {'x', 'X'}, {'c', 'C'}, {'v', 'V'},
/*30*/{'b', 'B'}, {'n', 'N'}, {'m', 'M'}, {',', '<'},
/*34*/{'.', '>'}, {'/', '?'}, {0x0, 0x0}, {'*', '*'},
/*38*/{0x0, 0x0}, {' ', ' '} };
Defines printable letter table according to scan code map. key_map[?][0] is lowercase letter for Shift key not pressed,
and key_map[?][1] is for when Shift key has been pressed.
if (scan_code & 0x80)
return;
print_c(key_map[scan_code&0x7f][shf_p], WHITE, BLACK);
If the keys has been release, does nothing. Otherwise print the character on screen with black background and white foreground.
}
/* Ctrl */
static void
ctl(void) {
ctl_p ^= 0x1;
}
/* Alt */
static void
alt(void) {
alt_p ^= 0x1;
}
/* Shift */
static void
shf(void) {
shf_p ^= 0x1;
}
/* F1, F2 ~ F12 */
static void
fun(void) {
}
/* not implementated */
static void
unp(void) {
}
ctl, alt and shf functions just set the key state. Actually in this tutorial we just handle Shift key to output capital letters.
We are almost there, add this interrupt entry in isr table,
05/keyboard/isr.s
.long do_timer, isr0x20, do_kb, isr0x21 #<<<=== over here
In the same file just like timer ISR,
isrNoError 0x20
isrNoError 0x21 #<<<=== over here
Changes the constant value of valid ISRs,
05/keyboard/include/isr.h
Finally, add kb_install to 05/keyboard/init.c.
timer_install(100);
kb_install(); /* here it is */
sti();
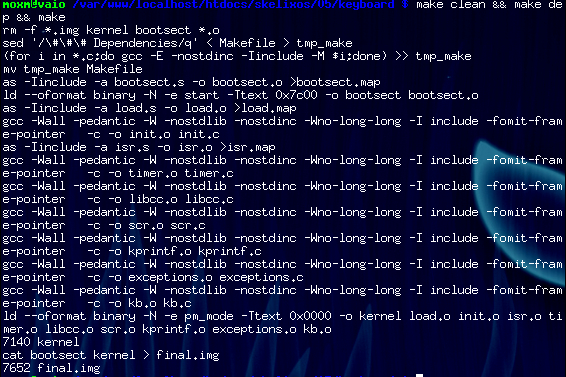
We use the same Makefile as the last one, just add the new modules to KERNEL_OBJS,
05/keyboard/Makefile
KERNEL_OBJS= load.o init.o isr.o timer.o libcc.o scr.o kprintf.o exceptions.o kb.o
Enjoy you typing...